Painting outdoor pottery is a fantastic way to personalize your garden or patio, adding a splash of color and creativity to your outdoor space. With the right preparation, materials, and techniques, you can transform ordinary pots into eye-catching features that withstand the elements and last for seasons to come. This guide will walk you through the process, from preparing the surface to choosing weather-resistant paints and sealants, ensuring your painted pottery remains vibrant and durable.
Preparing the Surface
The first step to a successful paint job is proper surface preparation. Start by removing any price tags, stickers, or old paint from the pot. For stubborn stickers, soaking the pot in a tub of warm water for up to an hour can help loosen the adhesive. Use a stiff brush to scrub away any remaining residue. If the pot has been previously painted, use a paint scraper to remove any chipping or peeling paint. Lightly sand the entire surface of the pot with medium to fine grit sandpaper. This not only removes any remaining old paint but also roughens the surface, providing a better grip for the new paint. Ensure the pot is completely clean and dry before moving on to the next step. For ceramic pots that are extra glazed and shiny, a thorough sanding is especially important to ensure proper paint adhesion. Additionally, cleaning the inside of the pots with a solution of 1 cup of Clorox bleach added to a gallon of water can kill any lingering plant-damaging microbes or fungus, ensuring the pots are sterile for newly transplanted plants. You may also want to consider pottery for gardening when choosing designs. Consider exploring pottery textures to add additional style.
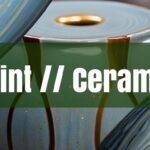
Choosing the Right Paint
Choosing the right type of paint is crucial for outdoor pottery to withstand the elements. Acrylic craft paints are a popular choice due to their versatility and wide range of colors. For added durability, consider using Rustoleum 2X Paint with Primer, especially if you’re looking for ease of application with spray paint. If your paint isn’t sticking well, using a primer before painting can improve adhesion, particularly on glazed or shiny surfaces. Enamel paints are also a good option for their durability and weather resistance. When applying the paint, use light, sweeping motions and apply several thin coats, allowing each coat to dry before applying the next. This technique helps prevent drips and ensures even coverage, especially on porous pots that may require more paint.
Sealing for Protection
Once the paint has dried completely, sealing the pottery is essential to protect it from water damage, UV rays, and general wear and tear. A clear acrylic sealer is an excellent choice for this purpose. Apply a solid coat of sealer to the entire exterior of the pot, including the bottom where the drainage hole is located. Once the exterior is dry, turn the pot over and seal the inside, again ensuring you cover the bottom. Terracotta is porous and will soak up moisture, so sealing both the painted and unpainted parts is crucial to prevent water from seeping in and ruining the paint job. For extra protection, apply two coats of sealer, allowing the first coat to dry before applying the second. Let the sealant cure for at least 48 hours before exposing the pots to moisture or planting anything in them. For those looking for a more robust sealant, epoxy resin can also be used to seal the paint.
Creative Painting Ideas
Creative painting ideas can truly transform your outdoor pottery into unique works of art. Simple designs like solid colors with added embellishments are easy to recreate, and tutorials are readily available online. Ombre drip effects can be achieved by using different shades of paint, creating a lovely and eye-catching pattern. For a rustic look, consider using chalkboard paint, allowing you to write the name of the plant or add other personalized details. Geometric stencils can add intricate patterns, while glitter can provide a fun and sparkly finish. Color blocking, floral designs, and marbled effects are other popular techniques to explore. Whether you prefer vibrant colors or subtle, aged looks, there are endless possibilities to personalize your outdoor pottery and bring your creative vision to life.
Repairing and Repainting Old Pottery
Repairing and repainting previously painted outdoor pottery is a great way to restore their appearance and protect them from further deterioration. Start by cleaning the pot thoroughly and removing any loose or peeling paint with a paint scraper. For cracks or breaks, epoxy can be used to glue the pieces back together. Clean the edges of the broken pieces with a sponge and alcohol to remove any dirt or grit, and let them dry completely. Apply the epoxy to the edges, press the pieces together, and wipe away any excess epoxy with a clean cloth. Allow the epoxy to cure for at least 15 hours before handling the pot. Once the repairs are complete, sand the surface to smooth out any imperfections and prepare it for painting. Follow the same painting and sealing steps as with new pottery to refresh the look and protect it from the elements. With a little effort, you can revive your old pottery and enjoy their beauty for years to come.