
Embarking on the delightful journey of painting a ceramic turtle is an accessible and rewarding creative project. Whether you’re an experienced artist or a beginner, this guide will walk you through the steps to transform a plain ceramic turtle into a personalized piece of art. From selecting the right paints and preparing your surface to applying intricate designs and sealing your work, each stage is designed to ensure a lasting and beautiful result. This article will cover surface preparation, the best painting techniques, design ideas, and sealing methods, ensuring a delightful and enduring artistic creation.
Preparing Your Ceramic Turtle for Painting
Before you begin painting, proper preparation is essential to ensure that the paint adheres well and the final product is durable. Start by thoroughly cleaning the ceramic surface. For previously glazed pieces, use an abrasive cleaner to scrub away any residues, ensuring the surface is free from dirt and oils (more info on cleaning ceramic surfaces). If you’re working with unglazed ceramic or greenware, ensure it has been fired to bisque to harden it adequately (details on the ceramic process).
Sanding is a crucial step, especially for glossy surfaces, as it creates microabrasions that allow the paint to grip better. Lightly sand the surface with steel wool for smaller pieces or 180-220 grit sandpaper for larger tiles, always wiping away the dust with a wet rag afterward (more on sanding ceramics). If the ceramic surface is porous, like air-hardening clay, seal it with a clay varnish or acrylic gloss medium to prevent it from absorbing moisture from the paints, which could soften the clay (tips for ceramic painting). Priming the surface with one or two light coats of a bonding primer can also enhance paint adhesion. Allow each coat of primer to dry completely, typically for 12-24 hours, and lightly sand if it appears gritty (additional painting tips).
Selecting Paints and Mastering Base Coating
Choosing the right type of paint is critical for achieving a lasting finish on your ceramic turtle. Acrylic paints are generally the best choice for unglazed ceramics due to their versatility and non-toxicity (info on using acrylic paints). Brands like Shuttle Art and Monte Marte offer highly-rated acrylic paint sets ideal for this purpose (the best ceramic paints). For glazed ceramics, porcelain paints such as those from Ratel, Mont Marte, and Decola are more suitable as they adhere better to the glossy surface (more on suitable paints). Enamel paints, which are oil-based, provide excellent durability and a glossy finish, making them a great option for glazed pottery (enamel paint guide). Ceramic paint pens are also useful for detailed work on both glazed and unglazed surfaces (using paint pens).
Once you’ve selected your paints, start with a base coat to provide an even surface for your design. Apply the base coat in thin, even layers using a soft brush, allowing each layer to dry completely before applying the next. For larger areas, consider using a spray paint, which works well on both glazed and unglazed surfaces and offers a smooth, uniform finish (base coating methods). Ensure the base coat is fully dry before moving on to detailing. For more information, see this article about underglaze tips, techniques, and mistakes to avoid.
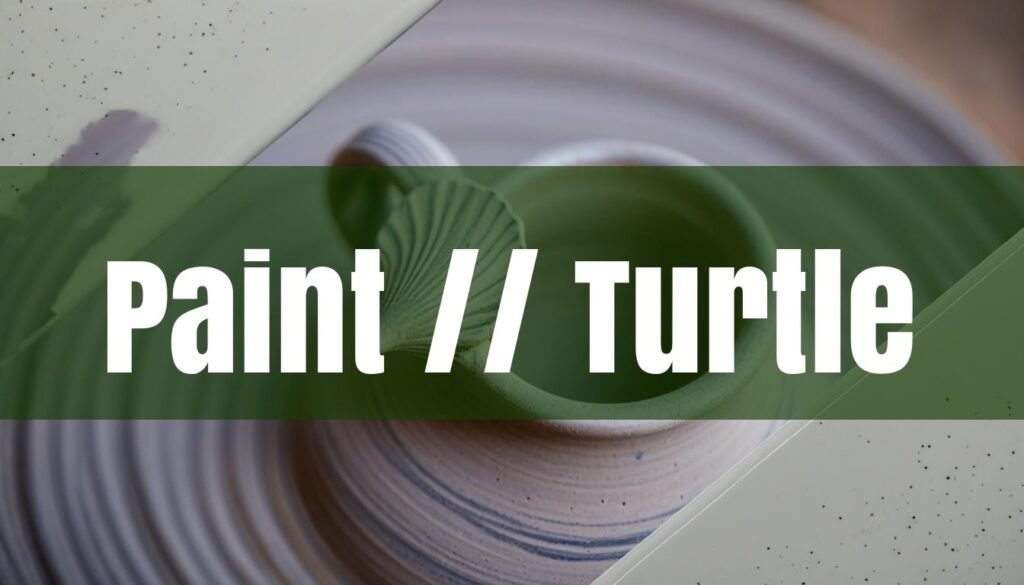
This video offers a great beginner’s guide to making glaze test tiles:
Creative Designs and Shading Techniques
With the base coat in place, it’s time to bring your ceramic turtle to life with creative designs and intricate details. Acrylic paints offer a wide range of vibrant colors that can be used to create eye-catching patterns on the turtle’s shell and body (ceramic turtle painting ideas). Consider geometric patterns, floral motifs, or even abstract designs to personalize your turtle. For inspiration, explore various turtle pottery painting ideas online to spark your creativity (pottery design ideas).
Adding shading and highlights can create depth and realism. Use darker shades of your base color to add shadows in recessed areas and lighter shades to highlight raised areas. Blending these shades smoothly will give your turtle a more three-dimensional appearance. Fine-tipped brushes or paint pens are excellent for adding intricate details such as scales, eyes, and other fine lines. Experiment with different painting techniques, such as dry brushing or stippling, to add texture and visual interest.
Sealing and Safety Measures
Once you’ve completed your design, sealing the painted ceramic turtle is essential to protect the artwork from damage and ensure its longevity. Various sealants are available, each offering different finishes and levels of protection. Ceramic glazes provide a glossy finish and added durability, making them ideal for pieces that will be handled frequently (sealing with ceramic glazes). Acrylic sealer sprays are a quick and easy option for sealing the entire surface evenly (acrylic sealer sprays). For items that may come into contact with food or water, consider using a dishwasher-safe Mod Podge to ensure the sealant remains intact after washing (using Mod Podge). If you’re feeling experimental, you might even try unlocking your kiln with experimental glaze recipes.
Apply the sealant in a well-ventilated area using even strokes, following the manufacturer’s instructions for drying times. Some sealants may require baking in an oven to cure, providing an extra layer of protection. Reapply the sealant periodically to maintain its protective layer. When working with paints and sealants, always prioritize safety. Ensure good ventilation to avoid inhaling harmful fumes, and wear gloves to prevent skin contact with potentially toxic materials (ceramics safety policies). Clean your work area thoroughly after each session to minimize dust exposure, and always wash your hands after handling ceramic materials (safety in ceramics).
Painting a ceramic turtle is a fulfilling and artistic endeavor. By carefully preparing the surface, selecting appropriate paints, and applying creative designs, you can craft a personalized masterpiece that will last for years. Always remember to prioritize safety by working in a well-ventilated area and taking necessary precautions to avoid exposure to toxic materials.
Related posts:
 Where to Buy Your Next Ceramic Turtle to Paint
 How to Paint Already Glazed Ceramics: A Comprehensive Guide
Painting already glazed ceramics offers a fantastic way to revitalize old pieces or add a personal touch to new ones. However, the smoothness of glazed surfaces requires specific techniques and materials to ensure lasting designs. This article provides a detailed guide, covering everything from surface preparation to paint application and protective sealing.
Preparing Your Glazed Ceramic Surface
Proper preparation is crucial for successful paint adhesion on glazed ceramics. The glossy surface can make it difficult for paint to stick, so thorough cleaning is essential. Begin by washing the ceramic item with soap and water to remove any dirt, dust, or oils (https://www.classpop.com/magazine/painting-ceramics). Follow this with an alcohol wipe to eliminate any remaining residues (https://www.triedandtrueblog.com/how-to-paint-glazed-ceramic/).
Next, lightly sand the glazed surface with fine-grit sandpaper (https://www.classpop.com/magazine/painting-ceramics). This step aims to create a slightly rougher texture without removing the glaze entirely, providing a better grip for the paint. After sanding, remove all sanding dust with a clean, damp cloth (https://www.classpop.com/magazine/painting-ceramics). Some artists also recommend applying a primer specifically designed for ceramics. Primers enhance paint adhesion and can significantly extend the life of your painted design (https://www.classpop.com/magazine/painting-ceramics). Taking the time to prepare the surface properly ensures a more durable and lasting painted design.
Choosing the Right Type of Paint
Selecting the appropriate paint is essential for achieving a durable finish on glazed ceramics. While various paints can be used, some are better suited due to their adhesive properties and durability. Acrylic paints are a popular choice due to their availability, wide range of colors, and ease of use (https://lakesidepottery.com/Pages/Pottery-tips/painting-coloring-repaired-ceramic-sculpture-tutorial.htm). For glazed ceramics, it’s advisable to use high-quality acrylic paints specifically formulated for glass or ceramics, such as DecoArt Glass Paint, as these offer better adhesion (https://www.triedandtrueblog.com/how-to-paint-glazed-ceramic/). These paints often have a thicker consistency, providing better coverage with fewer coats (https://www.triedandtrueblog.com/how-to-paint-glazed-ceramic/).
Enamel paints are another option, known for their glossy finish and durability. They are particularly suitable for items that will be handled frequently or exposed to the elements. However, enamel paints can have a strong odor and may require longer drying times. Specialized ceramic paints, available at art supply stores, are designed specifically for use on ceramics and offer excellent adhesion and vibrant colors. Another option is translucent or opaque glaze water-based colors, which are used to create decorative finishes (https://www.ceramic-glazes.com/effect-glazes). The best paint for your project will depend on your desired finish, the intended use of the ceramic piece, and your personal preferences.
Painting Techniques and Application
With your surface prepped and paint chosen, it’s time to begin painting. Apply thin, even coats of paint, avoiding excessive amounts to prevent drips and uneven coverage. Allow each coat to dry completely before applying the next (https://www.triedandtrueblog.com/how-to-paint-glazed-ceramic/). Depending on the paint used, multiple coats may be necessary to achieve full opacity. For intricate designs, use fine-tipped brushes for precise lines and details. Larger flat brushes are suitable for larger areas, while small, round-tip brushes are better for patterns or designs (https://diamondcoretools.com/blogs/resources/pottery-glazing-techniques?srsltid=AfmBOooaJwOVzcCuCYdVRJc2p2WcZ5rqnHI-V6iSarbp5OK8sH-yxOnq).
To avoid brush strokes, maintain a consistent brush direction and avoid going over the same area repeatedly while the paint is drying. For unique effects, explore stippling, sponging, or glaze trailing techniques to add texture and visual interest to your design (https://ceramicartsnetwork.org/pottery-making-illustrated/pottery-making-illustrated-article/8-Ways-to-Apply-Glaze). For example, use a slip trailer, a small squeezable bottle with an aperture tip, to create patterns (https://ceramicartsnetwork.org/pottery-making-illustrated/pottery-making-illustrated-article/8-Ways-to-Apply-Glaze). Patience is crucial; taking your time and allowing each layer to dry properly will result in a smoother, more professional-looking finish.
Sealing and Curing for Durability
After painting, sealing and curing are essential to protect your work and ensure its longevity. Sealing prevents chipping and fading and makes your ceramic piece suitable for practical use (https://drawlish.com/blogs/trending-articles/how-to-seal-acrylic-paint-on-ceramic?srsltid=AfmBOorYL3enT5zBYIt3vBY1oG8evmCGXEVrYLyEFbawcqiEyyEgG7mA). There are several options for sealants, each with its own pros and cons. Ceramic glaze can be applied for a glossy finish and added durability, but this usually requires firing the piece in a kiln. For a less involved method, use a water-based polyurethane varnish, clear acrylic coat, or Mod Podge (https://drawlish.com/blogs/trending-articles/how-to-seal-acrylic-paint-on-ceramic?srsltid=AfmBOorYL3enT5zBYIt3vBY1oG8evmCGXEVrYLyEFbawcqiEyyEgG7mA).
Apply the sealant in a well-ventilated area using even strokes to cover the entire painted surface (https://drawlish.com/blogs/trending-articles/how-to-seal-acrylic-paint-on-ceramic?srsltid=AfmBOorYL3enT5zBYIt3vBY1oG8evmCGXEVrYLyEFbawcqiEyyEgG7mA). Follow the manufacturer’s instructions for drying times, as some sealants may require several hours or even days to fully cure. Some sealants may require baking in an oven to cure, so be sure to read the instructions carefully (https://drawlish.com/blogs/trending-articles/how-to-seal-acrylic-paint-on-ceramic?srsltid=AfmBOorYL3enT5zBYIt3vBY1oG8evmCGXEVrYLyEFbawcqiEyyEgG7mA). While sealing protects your design, not all sealants are food-safe or dishwasher-safe (https://bigceramicstore.com/pages/info-ceramics-tips-tip18_waterproof_ceramics). If you intend to use your painted ceramic for dining, choose a sealant specifically labeled as food-safe and follow the manufacturer’s recommendations for use and care.
How to Paint Already Glazed Ceramics: A Comprehensive Guide
Painting already glazed ceramics offers a fantastic way to revitalize old pieces or add a personal touch to new ones. However, the smoothness of glazed surfaces requires specific techniques and materials to ensure lasting designs. This article provides a detailed guide, covering everything from surface preparation to paint application and protective sealing.
Preparing Your Glazed Ceramic Surface
Proper preparation is crucial for successful paint adhesion on glazed ceramics. The glossy surface can make it difficult for paint to stick, so thorough cleaning is essential. Begin by washing the ceramic item with soap and water to remove any dirt, dust, or oils (https://www.classpop.com/magazine/painting-ceramics). Follow this with an alcohol wipe to eliminate any remaining residues (https://www.triedandtrueblog.com/how-to-paint-glazed-ceramic/).
Next, lightly sand the glazed surface with fine-grit sandpaper (https://www.classpop.com/magazine/painting-ceramics). This step aims to create a slightly rougher texture without removing the glaze entirely, providing a better grip for the paint. After sanding, remove all sanding dust with a clean, damp cloth (https://www.classpop.com/magazine/painting-ceramics). Some artists also recommend applying a primer specifically designed for ceramics. Primers enhance paint adhesion and can significantly extend the life of your painted design (https://www.classpop.com/magazine/painting-ceramics). Taking the time to prepare the surface properly ensures a more durable and lasting painted design.
Choosing the Right Type of Paint
Selecting the appropriate paint is essential for achieving a durable finish on glazed ceramics. While various paints can be used, some are better suited due to their adhesive properties and durability. Acrylic paints are a popular choice due to their availability, wide range of colors, and ease of use (https://lakesidepottery.com/Pages/Pottery-tips/painting-coloring-repaired-ceramic-sculpture-tutorial.htm). For glazed ceramics, it’s advisable to use high-quality acrylic paints specifically formulated for glass or ceramics, such as DecoArt Glass Paint, as these offer better adhesion (https://www.triedandtrueblog.com/how-to-paint-glazed-ceramic/). These paints often have a thicker consistency, providing better coverage with fewer coats (https://www.triedandtrueblog.com/how-to-paint-glazed-ceramic/).
Enamel paints are another option, known for their glossy finish and durability. They are particularly suitable for items that will be handled frequently or exposed to the elements. However, enamel paints can have a strong odor and may require longer drying times. Specialized ceramic paints, available at art supply stores, are designed specifically for use on ceramics and offer excellent adhesion and vibrant colors. Another option is translucent or opaque glaze water-based colors, which are used to create decorative finishes (https://www.ceramic-glazes.com/effect-glazes). The best paint for your project will depend on your desired finish, the intended use of the ceramic piece, and your personal preferences.
Painting Techniques and Application
With your surface prepped and paint chosen, it’s time to begin painting. Apply thin, even coats of paint, avoiding excessive amounts to prevent drips and uneven coverage. Allow each coat to dry completely before applying the next (https://www.triedandtrueblog.com/how-to-paint-glazed-ceramic/). Depending on the paint used, multiple coats may be necessary to achieve full opacity. For intricate designs, use fine-tipped brushes for precise lines and details. Larger flat brushes are suitable for larger areas, while small, round-tip brushes are better for patterns or designs (https://diamondcoretools.com/blogs/resources/pottery-glazing-techniques?srsltid=AfmBOooaJwOVzcCuCYdVRJc2p2WcZ5rqnHI-V6iSarbp5OK8sH-yxOnq).
To avoid brush strokes, maintain a consistent brush direction and avoid going over the same area repeatedly while the paint is drying. For unique effects, explore stippling, sponging, or glaze trailing techniques to add texture and visual interest to your design (https://ceramicartsnetwork.org/pottery-making-illustrated/pottery-making-illustrated-article/8-Ways-to-Apply-Glaze). For example, use a slip trailer, a small squeezable bottle with an aperture tip, to create patterns (https://ceramicartsnetwork.org/pottery-making-illustrated/pottery-making-illustrated-article/8-Ways-to-Apply-Glaze). Patience is crucial; taking your time and allowing each layer to dry properly will result in a smoother, more professional-looking finish.
Sealing and Curing for Durability
After painting, sealing and curing are essential to protect your work and ensure its longevity. Sealing prevents chipping and fading and makes your ceramic piece suitable for practical use (https://drawlish.com/blogs/trending-articles/how-to-seal-acrylic-paint-on-ceramic?srsltid=AfmBOorYL3enT5zBYIt3vBY1oG8evmCGXEVrYLyEFbawcqiEyyEgG7mA). There are several options for sealants, each with its own pros and cons. Ceramic glaze can be applied for a glossy finish and added durability, but this usually requires firing the piece in a kiln. For a less involved method, use a water-based polyurethane varnish, clear acrylic coat, or Mod Podge (https://drawlish.com/blogs/trending-articles/how-to-seal-acrylic-paint-on-ceramic?srsltid=AfmBOorYL3enT5zBYIt3vBY1oG8evmCGXEVrYLyEFbawcqiEyyEgG7mA).
Apply the sealant in a well-ventilated area using even strokes to cover the entire painted surface (https://drawlish.com/blogs/trending-articles/how-to-seal-acrylic-paint-on-ceramic?srsltid=AfmBOorYL3enT5zBYIt3vBY1oG8evmCGXEVrYLyEFbawcqiEyyEgG7mA). Follow the manufacturer’s instructions for drying times, as some sealants may require several hours or even days to fully cure. Some sealants may require baking in an oven to cure, so be sure to read the instructions carefully (https://drawlish.com/blogs/trending-articles/how-to-seal-acrylic-paint-on-ceramic?srsltid=AfmBOorYL3enT5zBYIt3vBY1oG8evmCGXEVrYLyEFbawcqiEyyEgG7mA). While sealing protects your design, not all sealants are food-safe or dishwasher-safe (https://bigceramicstore.com/pages/info-ceramics-tips-tip18_waterproof_ceramics). If you intend to use your painted ceramic for dining, choose a sealant specifically labeled as food-safe and follow the manufacturer’s recommendations for use and care.
 Where to Buy Ceramics to Paint: A Comprehensive Guide
 Where Can I Buy Ceramics to Paint Near Me?: Your Creative Pottery Guide