How to Paint Already Glazed Ceramics: A Comprehensive Guide Painting already glazed ceramics offers a fantastic way to revitalize old pieces or add a personal touch to new ones. However, the smoothness of glazed surfaces requires specific techniques and materials to ensure lasting designs. This article provides a detailed guide, covering everything from surface preparation to paint application and protective sealing. Preparing Your Glazed Ceramic Surface Proper preparation is crucial for successful paint adhesion on glazed ceramics. The glossy surface can make it difficult for paint to stick, so thorough cleaning is essential. Begin by washing the ceramic item with soap and water to remove any dirt, dust, or oils (https://www.classpop.com/magazine/painting-ceramics). Follow this with an alcohol wipe to eliminate any remaining residues (https://www.triedandtrueblog.com/how-to-paint-glazed-ceramic/). Next, lightly sand the glazed surface with fine-grit sandpaper (https://www.classpop.com/magazine/painting-ceramics). This step aims to create a slightly rougher texture without removing the glaze entirely, providing a better grip for the paint. After sanding, remove all sanding dust with a clean, damp cloth (https://www.classpop.com/magazine/painting-ceramics). Some artists also recommend applying a primer specifically designed for ceramics. Primers enhance paint adhesion and can significantly extend the life of your painted design (https://www.classpop.com/magazine/painting-ceramics). Taking the time to prepare the surface properly ensures a more durable and lasting painted design. Choosing the Right Type of Paint Selecting the appropriate paint is essential for achieving a durable finish on glazed ceramics. While various paints can be used, some are better suited due to their adhesive properties and durability. Acrylic paints are a popular choice due to their availability, wide range of colors, and ease of use (https://lakesidepottery.com/Pages/Pottery-tips/painting-coloring-repaired-ceramic-sculpture-tutorial.htm). For glazed ceramics, it's advisable to use high-quality acrylic paints specifically formulated for glass or ceramics, such as DecoArt Glass Paint, as these offer better adhesion (https://www.triedandtrueblog.com/how-to-paint-glazed-ceramic/). These paints often have a thicker consistency, providing better coverage with fewer coats (https://www.triedandtrueblog.com/how-to-paint-glazed-ceramic/). Enamel paints are another option, known for their glossy finish and durability. They are particularly suitable for items that will be handled frequently or exposed to the elements. However, enamel paints can have a strong odor and may require longer drying times. Specialized ceramic paints, available at art supply stores, are designed specifically for use on ceramics and offer excellent adhesion and vibrant colors. Another option is translucent or opaque glaze water-based colors, which are used to create decorative finishes (https://www.ceramic-glazes.com/effect-glazes). The best paint for your project will depend on your desired finish, the intended use of the ceramic piece, and your personal preferences. Painting Techniques and Application With your surface prepped and paint chosen, it's time to begin painting. Apply thin, even coats of paint, avoiding excessive amounts to prevent drips and uneven coverage. Allow each coat to dry completely before applying the next (https://www.triedandtrueblog.com/how-to-paint-glazed-ceramic/). Depending on the paint used, multiple coats may be necessary to achieve full opacity. For intricate designs, use fine-tipped brushes for precise lines and details. Larger flat brushes are suitable for larger areas, while small, round-tip brushes are better for patterns or designs (https://diamondcoretools.com/blogs/resources/pottery-glazing-techniques?srsltid=AfmBOooaJwOVzcCuCYdVRJc2p2WcZ5rqnHI-V6iSarbp5OK8sH-yxOnq). To avoid brush strokes, maintain a consistent brush direction and avoid going over the same area repeatedly while the paint is drying. For unique effects, explore stippling, sponging, or glaze trailing techniques to add texture and visual interest to your design (https://ceramicartsnetwork.org/pottery-making-illustrated/pottery-making-illustrated-article/8-Ways-to-Apply-Glaze). For example, use a slip trailer, a small squeezable bottle with an aperture tip, to create patterns (https://ceramicartsnetwork.org/pottery-making-illustrated/pottery-making-illustrated-article/8-Ways-to-Apply-Glaze). Patience is crucial; taking your time and allowing each layer to dry properly will result in a smoother, more professional-looking finish. Sealing and Curing for Durability After painting, sealing and curing are essential to protect your work and ensure its longevity. Sealing prevents chipping and fading and makes your ceramic piece suitable for practical use (https://drawlish.com/blogs/trending-articles/how-to-seal-acrylic-paint-on-ceramic?srsltid=AfmBOorYL3enT5zBYIt3vBY1oG8evmCGXEVrYLyEFbawcqiEyyEgG7mA). There are several options for sealants, each with its own pros and cons. Ceramic glaze can be applied for a glossy finish and added durability, but this usually requires firing the piece in a kiln. For a less involved method, use a water-based polyurethane varnish, clear acrylic coat, or Mod Podge (https://drawlish.com/blogs/trending-articles/how-to-seal-acrylic-paint-on-ceramic?srsltid=AfmBOorYL3enT5zBYIt3vBY1oG8evmCGXEVrYLyEFbawcqiEyyEgG7mA). Apply the sealant in a well-ventilated area using even strokes to cover the entire painted surface (https://drawlish.com/blogs/trending-articles/how-to-seal-acrylic-paint-on-ceramic?srsltid=AfmBOorYL3enT5zBYIt3vBY1oG8evmCGXEVrYLyEFbawcqiEyyEgG7mA). Follow the manufacturer's instructions for drying times, as some sealants may require several hours or even days to fully cure. Some sealants may require baking in an oven to cure, so be sure to read the instructions carefully (https://drawlish.com/blogs/trending-articles/how-to-seal-acrylic-paint-on-ceramic?srsltid=AfmBOorYL3enT5zBYIt3vBY1oG8evmCGXEVrYLyEFbawcqiEyyEgG7mA). While sealing protects your design, not all sealants are food-safe or dishwasher-safe (https://bigceramicstore.com/pages/info-ceramics-tips-tip18_waterproof_ceramics). If you intend to use your painted ceramic for dining, choose a sealant specifically labeled as food-safe and follow the manufacturer's recommendations for use and care.

How to Paint Already Glazed Ceramics: A Comprehensive Guide Painting already glazed ceramics offers a fantastic way to revitalize old pieces or add a personal touch to new ones. However, the smoothness of glazed surfaces requires specific techniques and materials to ensure lasting designs. This article provides a detailed guide, covering everything from surface preparation to paint application and protective sealing. Preparing Your Glazed Ceramic Surface Proper preparation is crucial for successful paint adhesion on glazed ceramics. The glossy surface can make it difficult for paint to stick, so thorough cleaning is essential. Begin by washing the ceramic item with soap and water to remove any dirt, dust, or oils (https://www.classpop.com/magazine/painting-ceramics). Follow this with an alcohol wipe to eliminate any remaining residues (https://www.triedandtrueblog.com/how-to-paint-glazed-ceramic/). Next, lightly sand the glazed surface with fine-grit sandpaper (https://www.classpop.com/magazine/painting-ceramics). This step aims to create a slightly rougher texture without removing the glaze entirely, providing a better grip for the paint. After sanding, remove all sanding dust with a clean, damp cloth (https://www.classpop.com/magazine/painting-ceramics). Some artists also recommend applying a primer specifically designed for ceramics. Primers enhance paint adhesion and can significantly extend the life of your painted design (https://www.classpop.com/magazine/painting-ceramics). Taking the time to prepare the surface properly ensures a more durable and lasting painted design. Choosing the Right Type of Paint Selecting the appropriate paint is essential for achieving a durable finish on glazed ceramics. While various paints can be used, some are better suited due to their adhesive properties and durability. Acrylic paints are a popular choice due to their availability, wide range of colors, and ease of use (https://lakesidepottery.com/Pages/Pottery-tips/painting-coloring-repaired-ceramic-sculpture-tutorial.htm). For glazed ceramics, it’s advisable to use high-quality acrylic paints specifically formulated for glass or ceramics, such as DecoArt Glass Paint, as these offer better adhesion (https://www.triedandtrueblog.com/how-to-paint-glazed-ceramic/). These paints often have a thicker consistency, providing better coverage with fewer coats (https://www.triedandtrueblog.com/how-to-paint-glazed-ceramic/). Enamel paints are another option, known for their glossy finish and durability. They are particularly suitable for items that will be handled frequently or exposed to the elements. However, enamel paints can have a strong odor and may require longer drying times. Specialized ceramic paints, available at art supply stores, are designed specifically for use on ceramics and offer excellent adhesion and vibrant colors. Another option is translucent or opaque glaze water-based colors, which are used to create decorative finishes (https://www.ceramic-glazes.com/effect-glazes). The best paint for your project will depend on your desired finish, the intended use of the ceramic piece, and your personal preferences. Painting Techniques and Application With your surface prepped and paint chosen, it’s time to begin painting. Apply thin, even coats of paint, avoiding excessive amounts to prevent drips and uneven coverage. Allow each coat to dry completely before applying the next (https://www.triedandtrueblog.com/how-to-paint-glazed-ceramic/). Depending on the paint used, multiple coats may be necessary to achieve full opacity. For intricate designs, use fine-tipped brushes for precise lines and details. Larger flat brushes are suitable for larger areas, while small, round-tip brushes are better for patterns or designs (https://diamondcoretools.com/blogs/resources/pottery-glazing-techniques?srsltid=AfmBOooaJwOVzcCuCYdVRJc2p2WcZ5rqnHI-V6iSarbp5OK8sH-yxOnq). To avoid brush strokes, maintain a consistent brush direction and avoid going over the same area repeatedly while the paint is drying. For unique effects, explore stippling, sponging, or glaze trailing techniques to add texture and visual interest to your design (https://ceramicartsnetwork.org/pottery-making-illustrated/pottery-making-illustrated-article/8-Ways-to-Apply-Glaze). For example, use a slip trailer, a small squeezable bottle with an aperture tip, to create patterns (https://ceramicartsnetwork.org/pottery-making-illustrated/pottery-making-illustrated-article/8-Ways-to-Apply-Glaze). Patience is crucial; taking your time and allowing each layer to dry properly will result in a smoother, more professional-looking finish. Sealing and Curing for Durability After painting, sealing and curing are essential to protect your work and ensure its longevity. Sealing prevents chipping and fading and makes your ceramic piece suitable for practical use (https://drawlish.com/blogs/trending-articles/how-to-seal-acrylic-paint-on-ceramic?srsltid=AfmBOorYL3enT5zBYIt3vBY1oG8evmCGXEVrYLyEFbawcqiEyyEgG7mA). There are several options for sealants, each with its own pros and cons. Ceramic glaze can be applied for a glossy finish and added durability, but this usually requires firing the piece in a kiln. For a less involved method, use a water-based polyurethane varnish, clear acrylic coat, or Mod Podge (https://drawlish.com/blogs/trending-articles/how-to-seal-acrylic-paint-on-ceramic?srsltid=AfmBOorYL3enT5zBYIt3vBY1oG8evmCGXEVrYLyEFbawcqiEyyEgG7mA). Apply the sealant in a well-ventilated area using even strokes to cover the entire painted surface (https://drawlish.com/blogs/trending-articles/how-to-seal-acrylic-paint-on-ceramic?srsltid=AfmBOorYL3enT5zBYIt3vBY1oG8evmCGXEVrYLyEFbawcqiEyyEgG7mA). Follow the manufacturer’s instructions for drying times, as some sealants may require several hours or even days to fully cure. Some sealants may require baking in an oven to cure, so be sure to read the instructions carefully (https://drawlish.com/blogs/trending-articles/how-to-seal-acrylic-paint-on-ceramic?srsltid=AfmBOorYL3enT5zBYIt3vBY1oG8evmCGXEVrYLyEFbawcqiEyyEgG7mA). While sealing protects your design, not all sealants are food-safe or dishwasher-safe (https://bigceramicstore.com/pages/info-ceramics-tips-tip18_waterproof_ceramics). If you intend to use your painted ceramic for dining, choose a sealant specifically labeled as food-safe and follow the manufacturer’s recommendations for use and care.

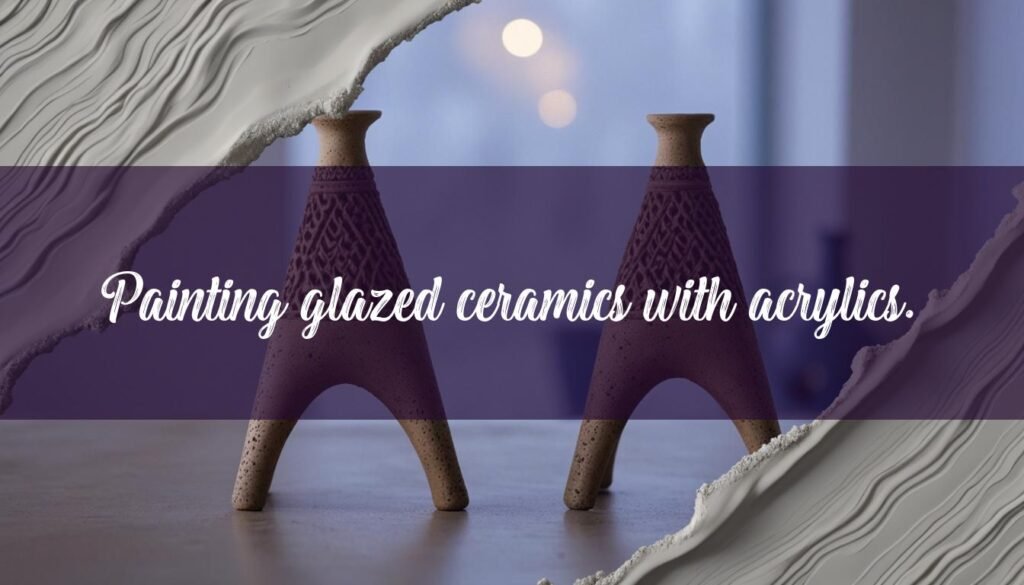
Painting already glazed ceramics can be a fun and creative way to breathe new life into old pieces or personalize store-bought items. However, because of the slick surface, it’s important to approach the project with the right techniques and materials to ensure your designs last. This article will guide you through the process, from prepping your ceramic piece to applying paint and sealing your artwork for durability. You can find ceramics to paint at many local shops, or explore options for buying ceramics to paint online.

Preparing Your Glazed Ceramic Surface

Before you even think about picking up a paintbrush, proper preparation is key to ensuring the paint adheres well to the glazed surface. Glazed ceramics are notoriously smooth, which can make it difficult for paint to stick. Start by thoroughly cleaning the ceramic item with soap and water to remove any dirt, dust, or oils. After washing, give the piece a final wipe down with an alcohol wipe to eliminate any lingering residues.

Next, lightly sand the glazed surface with fine-grit sandpaper. The goal here isn’t to remove the glaze entirely, but to create a slightly rougher texture that the paint can grip onto. After sanding, it’s crucial to remove all sanding dust with a clean, damp cloth. Some artists also recommend applying a primer specifically designed for ceramics. Primers help the paint adhere better and can significantly extend the life of your painted design. By taking the time to properly prepare the surface, you’re setting yourself up for success and ensuring that your painted design will last.

Choosing the Right Type of Paint

Selecting the correct type of paint is crucial for a successful and lasting finish on glazed ceramics. While various paints can be used, some are better suited than others due to their adhesive properties and durability. Acrylic paints are a popular choice because they are readily available, come in a wide range of colors, and are relatively easy to work with. For glazed ceramics, it’s advisable to use high-quality acrylic paints that are specifically formulated for glass or ceramics, like DecoArt Glass Paint, as these offer better adhesion. These paints often have a thicker consistency, providing better coverage with fewer coats.

Enamel paints are another option, known for their glossy finish and durability. They are particularly suitable for items that will be handled frequently or exposed to the elements. However, enamel paints can have a strong odor and may require longer drying times. Specialized ceramic paints, which can be found at art supply stores, are designed specifically for use on ceramics and offer excellent adhesion and vibrant colors. Another option is translucent or opaque glaze water-based colors which are used to create decorative finishes. Ultimately, the best paint for your project will depend on your desired finish, the intended use of the ceramic piece, and your personal preferences.

This video from Ceramic Materials Workshop provides a great overview of using UMF in glaze chemistry. Understanding UMF is key to successful glaze application.

Painting Techniques and Application

Once your surface is prepped and your paint is chosen, it’s time for the fun part: painting! Start by applying thin, even coats of paint. Avoid applying too much paint at once, as this can lead to drips and uneven coverage. Allow each coat to dry completely before applying the next. Depending on the paint you’re using, you may need to apply multiple coats to achieve full opacity. For intricate designs, consider using fine-tipped brushes to achieve precise lines and details. If you’re working on a larger area, larger flat brushes are great for larger pieces, and small, round-tip brushes are better for patterns or designs.

To avoid brush strokes, try to maintain a consistent brush direction and avoid going over the same area repeatedly while the paint is drying. If you want to try something unique, you can explore stippling, sponging, or glaze trailing techniques to add texture and visual interest to your design. For example, using a slip trailer, which is a small squeezable bottle with an aperture tip, to create patterns. Remember, patience is key! Taking your time and allowing each layer to dry properly will result in a smoother, more professional-looking finish.

Sealing and Curing for Durability

After you’ve finished painting your design, sealing and curing are essential steps to protect your work and ensure its longevity. Sealing the paint not only prevents chipping and fading but also makes your ceramic piece suitable for practical use. There are several options for sealants, each with its own pros and cons. Ceramic glaze can be applied for a glossy finish and added durability, but this usually requires firing the piece in a kiln. For a less involved method, you can use a water-based polyurethane varnish, clear acrylic coat, or Mod Podge.

When applying a sealant, work in a well-ventilated area and use even strokes to cover the entire painted surface. Follow the manufacturer’s instructions for drying times, as some sealants may require several hours or even days to fully cure. Some sealants may require baking in an oven to cure, so be sure to read the instructions carefully. While sealing can protect your design, it’s important to note that not all sealants are food-safe or dishwasher-safe. If you intend to use your painted ceramic for dining, be sure to choose a sealant that is specifically labeled as food-safe and follow the manufacturer’s recommendations for use and care. For more information, explore this guide on the best paint to use on ceramic.

Leave a Comment

Your email address will not be published. Required fields are marked *

We use cookies to analyse our traffic. It helps us understand who visits our site and what kind of content they want to see. View more
Cookies settings
Accept
Privacy & Cookie policy
Privacy & Cookies policy
Cookie name Active

Who we are

Suggested text: Our website address is: http://potterygeek.com.

Comments

Suggested text: When visitors leave comments on the site we collect the data shown in the comments form, and also the visitor’s IP address and browser user agent string to help spam detection. An anonymized string created from your email address (also called a hash) may be provided to the Gravatar service to see if you are using it. The Gravatar service privacy policy is available here: https://automattic.com/privacy/. After approval of your comment, your profile picture is visible to the public in the context of your comment.

Media

Suggested text: If you upload images to the website, you should avoid uploading images with embedded location data (EXIF GPS) included. Visitors to the website can download and extract any location data from images on the website.

Cookies

Suggested text: If you leave a comment on our site you may opt-in to saving your name, email address and website in cookies. These are for your convenience so that you do not have to fill in your details again when you leave another comment. These cookies will last for one year. If you visit our login page, we will set a temporary cookie to determine if your browser accepts cookies. This cookie contains no personal data and is discarded when you close your browser. When you log in, we will also set up several cookies to save your login information and your screen display choices. Login cookies last for two days, and screen options cookies last for a year. If you select "Remember Me", your login will persist for two weeks. If you log out of your account, the login cookies will be removed. If you edit or publish an article, an additional cookie will be saved in your browser. This cookie includes no personal data and simply indicates the post ID of the article you just edited. It expires after 1 day.

Embedded content from other websites

Suggested text: Articles on this site may include embedded content (e.g. videos, images, articles, etc.). Embedded content from other websites behaves in the exact same way as if the visitor has visited the other website. These websites may collect data about you, use cookies, embed additional third-party tracking, and monitor your interaction with that embedded content, including tracking your interaction with the embedded content if you have an account and are logged in to that website.

Who we share your data with

Suggested text: If you request a password reset, your IP address will be included in the reset email.

How long we retain your data

Suggested text: If you leave a comment, the comment and its metadata are retained indefinitely. This is so we can recognize and approve any follow-up comments automatically instead of holding them in a moderation queue. For users that register on our website (if any), we also store the personal information they provide in their user profile. All users can see, edit, or delete their personal information at any time (except they cannot change their username). Website administrators can also see and edit that information.

What rights you have over your data

Suggested text: If you have an account on this site, or have left comments, you can request to receive an exported file of the personal data we hold about you, including any data you have provided to us. You can also request that we erase any personal data we hold about you. This does not include any data we are obliged to keep for administrative, legal, or security purposes.

Where your data is sent

Suggested text: Visitor comments may be checked through an automated spam detection service.
Save settings
Cookies settings