
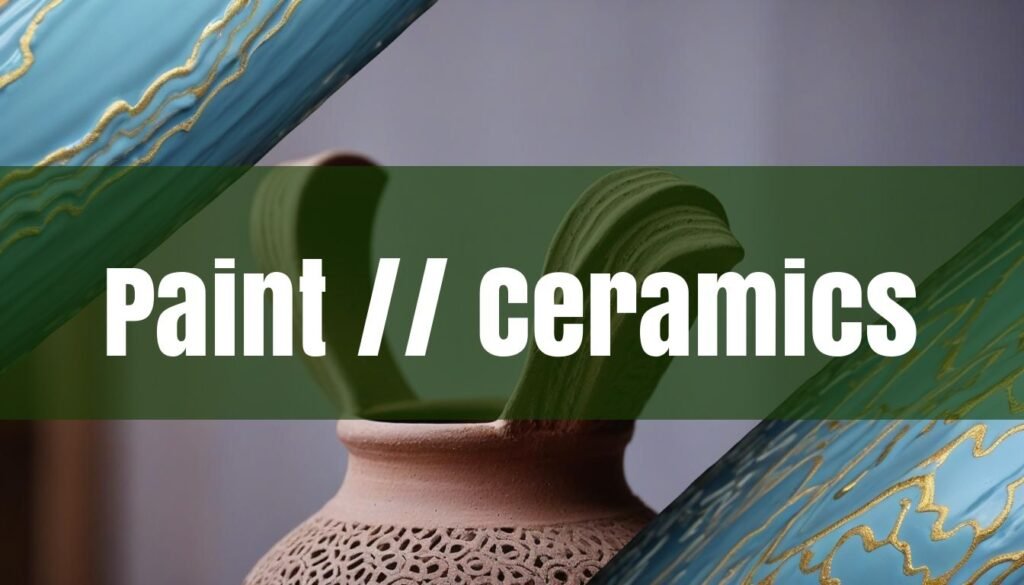
Painting already fired ceramics is a fun and creative way to breathe new life into old pieces, personalize gifts, or create unique décor. Unlike traditional ceramic processes where paint is applied to greenware or bisque and then fired for a permanent bond, painting already fired ceramics requires a different approach. This article will guide you through the techniques, materials, and precautions necessary to achieve a lasting and beautiful finish on your ceramic creations.
Understanding the Basics
Traditional ceramic paints, also known as underglazes and glazes, are designed to fuse with the clay body during the firing process. This high-temperature firing (often between 1745℉ and 2455℉, or 950℃ and 1346℃) creates a durable, waterproof, and often food-safe surface. However, once a ceramic piece has been fired, it’s no longer porous and won’t accept these traditional materials in the same way. Applying traditional glazes to previously fired ceramics and re-firing can lead to unpredictable results. The existing glaze might react adversely, the colors could change, or the piece could even warp or crack. Therefore, painting already fired ceramics requires alternative paints and methods that adhere to the surface without the need for re-firing. For more information, explore unlocking glaze chemistry.
Preparing Your Ceramic Surface
Proper preparation is key to ensuring your paint adheres well and lasts long. Start by thoroughly cleaning the ceramic piece. Use a mild soap and water solution to remove any dirt, dust, oils, or fingerprints. Rinse well and allow the piece to dry completely. Once dry, inspect the surface for any imperfections, such as bumps or unevenness. If necessary, gently sand the surface with fine-grit sandpaper. This will create a slightly rougher texture that helps the paint grip the surface better. Be sure to wipe away any sanding dust with a clean, damp cloth. For glazed ceramics, sanding is especially important, as the glaze creates a smooth, non-porous surface that paint struggles to adhere to. If you’re working with a glazed piece, consider using an alcohol wipe after sanding to remove any remaining residue. In some cases, applying a primer can further enhance paint adhesion. Choose a primer specifically designed for use on non-porous surfaces, and follow the manufacturer’s instructions for application and drying time.
Choosing the Right Paints and Techniques
When it comes to painting already fired ceramics, acrylic paints are a popular and versatile choice. They are water-based, non-toxic (in most brands), and available in a wide range of colors and finishes. Acrylics are also relatively affordable and easy to find at most craft stores. However, standard acrylic paints may not adhere well to glazed surfaces and can be easily scratched off. To improve adhesion, consider using specialty acrylic paints designed for glass and ceramics, such as DecoArt Glass Paint. These paints are formulated to bond better with smooth surfaces and often offer a more durable, scratch-resistant finish. Another option is to mix a product like Golden GAC 200 with your acrylic paints. GAC 200 is an acrylic polymer that improves adhesion to non-porous surfaces and makes the paint harder and more durable. Enamel paints are another suitable choice for painting ceramics. These oil-based paints are known for their durability and glossy finish. They are also more resistant to heat, making them a good option for decorative pieces that might be exposed to warm temperatures. When applying paint to your ceramic piece, use smooth, even strokes. Avoid applying the paint too thickly, as this can lead to drips and uneven drying. It’s better to apply several thin coats, allowing each coat to dry completely before applying the next. Depending on the design, you can use a variety of brushes, sponges, or even paint markers to achieve different effects. Once the paint is dry, consider sealing the surface with a clear coat of varnish or sealant. This will protect the paint from scratches, fading, and moisture, and further enhance its durability. Choose a sealant specifically designed for use on acrylic or enamel paints, and follow the manufacturer’s instructions for application and drying time. Learn more about enhancing your pottery with ceramic surface design. For further techniques, consider sgraffito to add texture.
This video from Little Street Pottery demonstrates eight different ways to apply underglazes to your pottery. It’s a great visual guide to complement this article’s information on painting ceramics.
Avoiding Common Problems and Ensuring Safety
Despite your best efforts, you may encounter some common problems when painting previously fired ceramics. One of the most frequent issues is paint peeling or chipping. This is often caused by poor surface preparation or using the wrong type of paint. To prevent peeling, make sure to thoroughly clean and sand the ceramic surface before painting, and use a paint that is specifically designed for use on non-porous materials. If you’re still experiencing problems, try applying a primer before painting or using a stronger sealant after painting. Uneven coverage can also be an issue, especially when painting over dark or patterned surfaces. To achieve even coverage, apply several thin coats of paint, allowing each coat to dry completely before applying the next. You may also need to use a different type of brush or painting technique to achieve the desired effect.
When working with paints and sealants, it’s important to take certain safety precautions. Always work in a well-ventilated area to avoid inhaling harmful fumes. Wear gloves to protect your hands from the chemicals in the paints and sealants, and avoid getting paint in your eyes or mouth. If you’re using spray paints or sealants, wear a respirator to protect your lungs from inhaling the aerosolized particles. Be sure to read and follow all of the manufacturer’s instructions and safety warnings before using any painting or sealing products. Find more information about pottery studio safety here.
Painting already fired ceramics offers a wonderful opportunity to express your creativity and personalize your ceramic pieces. By understanding the basics of surface preparation, paint selection, and application techniques, you can achieve beautiful and lasting results. Remember to take your time, be patient, and don’t be afraid to experiment with different colors, designs, and finishes. With a little practice, you’ll be able to transform ordinary ceramic pieces into unique works of art.
Related posts:
 How to Paint Already Glazed Ceramics: A Comprehensive Guide
Painting already glazed ceramics offers a fantastic way to revitalize old pieces or add a personal touch to new ones. However, the smoothness of glazed surfaces requires specific techniques and materials to ensure lasting designs. This article provides a detailed guide, covering everything from surface preparation to paint application and protective sealing.
Preparing Your Glazed Ceramic Surface
Proper preparation is crucial for successful paint adhesion on glazed ceramics. The glossy surface can make it difficult for paint to stick, so thorough cleaning is essential. Begin by washing the ceramic item with soap and water to remove any dirt, dust, or oils (https://www.classpop.com/magazine/painting-ceramics). Follow this with an alcohol wipe to eliminate any remaining residues (https://www.triedandtrueblog.com/how-to-paint-glazed-ceramic/).
Next, lightly sand the glazed surface with fine-grit sandpaper (https://www.classpop.com/magazine/painting-ceramics). This step aims to create a slightly rougher texture without removing the glaze entirely, providing a better grip for the paint. After sanding, remove all sanding dust with a clean, damp cloth (https://www.classpop.com/magazine/painting-ceramics). Some artists also recommend applying a primer specifically designed for ceramics. Primers enhance paint adhesion and can significantly extend the life of your painted design (https://www.classpop.com/magazine/painting-ceramics). Taking the time to prepare the surface properly ensures a more durable and lasting painted design.
Choosing the Right Type of Paint
Selecting the appropriate paint is essential for achieving a durable finish on glazed ceramics. While various paints can be used, some are better suited due to their adhesive properties and durability. Acrylic paints are a popular choice due to their availability, wide range of colors, and ease of use (https://lakesidepottery.com/Pages/Pottery-tips/painting-coloring-repaired-ceramic-sculpture-tutorial.htm). For glazed ceramics, it’s advisable to use high-quality acrylic paints specifically formulated for glass or ceramics, such as DecoArt Glass Paint, as these offer better adhesion (https://www.triedandtrueblog.com/how-to-paint-glazed-ceramic/). These paints often have a thicker consistency, providing better coverage with fewer coats (https://www.triedandtrueblog.com/how-to-paint-glazed-ceramic/).
Enamel paints are another option, known for their glossy finish and durability. They are particularly suitable for items that will be handled frequently or exposed to the elements. However, enamel paints can have a strong odor and may require longer drying times. Specialized ceramic paints, available at art supply stores, are designed specifically for use on ceramics and offer excellent adhesion and vibrant colors. Another option is translucent or opaque glaze water-based colors, which are used to create decorative finishes (https://www.ceramic-glazes.com/effect-glazes). The best paint for your project will depend on your desired finish, the intended use of the ceramic piece, and your personal preferences.
Painting Techniques and Application
With your surface prepped and paint chosen, it’s time to begin painting. Apply thin, even coats of paint, avoiding excessive amounts to prevent drips and uneven coverage. Allow each coat to dry completely before applying the next (https://www.triedandtrueblog.com/how-to-paint-glazed-ceramic/). Depending on the paint used, multiple coats may be necessary to achieve full opacity. For intricate designs, use fine-tipped brushes for precise lines and details. Larger flat brushes are suitable for larger areas, while small, round-tip brushes are better for patterns or designs (https://diamondcoretools.com/blogs/resources/pottery-glazing-techniques?srsltid=AfmBOooaJwOVzcCuCYdVRJc2p2WcZ5rqnHI-V6iSarbp5OK8sH-yxOnq).
To avoid brush strokes, maintain a consistent brush direction and avoid going over the same area repeatedly while the paint is drying. For unique effects, explore stippling, sponging, or glaze trailing techniques to add texture and visual interest to your design (https://ceramicartsnetwork.org/pottery-making-illustrated/pottery-making-illustrated-article/8-Ways-to-Apply-Glaze). For example, use a slip trailer, a small squeezable bottle with an aperture tip, to create patterns (https://ceramicartsnetwork.org/pottery-making-illustrated/pottery-making-illustrated-article/8-Ways-to-Apply-Glaze). Patience is crucial; taking your time and allowing each layer to dry properly will result in a smoother, more professional-looking finish.
Sealing and Curing for Durability
After painting, sealing and curing are essential to protect your work and ensure its longevity. Sealing prevents chipping and fading and makes your ceramic piece suitable for practical use (https://drawlish.com/blogs/trending-articles/how-to-seal-acrylic-paint-on-ceramic?srsltid=AfmBOorYL3enT5zBYIt3vBY1oG8evmCGXEVrYLyEFbawcqiEyyEgG7mA). There are several options for sealants, each with its own pros and cons. Ceramic glaze can be applied for a glossy finish and added durability, but this usually requires firing the piece in a kiln. For a less involved method, use a water-based polyurethane varnish, clear acrylic coat, or Mod Podge (https://drawlish.com/blogs/trending-articles/how-to-seal-acrylic-paint-on-ceramic?srsltid=AfmBOorYL3enT5zBYIt3vBY1oG8evmCGXEVrYLyEFbawcqiEyyEgG7mA).
Apply the sealant in a well-ventilated area using even strokes to cover the entire painted surface (https://drawlish.com/blogs/trending-articles/how-to-seal-acrylic-paint-on-ceramic?srsltid=AfmBOorYL3enT5zBYIt3vBY1oG8evmCGXEVrYLyEFbawcqiEyyEgG7mA). Follow the manufacturer’s instructions for drying times, as some sealants may require several hours or even days to fully cure. Some sealants may require baking in an oven to cure, so be sure to read the instructions carefully (https://drawlish.com/blogs/trending-articles/how-to-seal-acrylic-paint-on-ceramic?srsltid=AfmBOorYL3enT5zBYIt3vBY1oG8evmCGXEVrYLyEFbawcqiEyyEgG7mA). While sealing protects your design, not all sealants are food-safe or dishwasher-safe (https://bigceramicstore.com/pages/info-ceramics-tips-tip18_waterproof_ceramics). If you intend to use your painted ceramic for dining, choose a sealant specifically labeled as food-safe and follow the manufacturer’s recommendations for use and care.
How to Paint Already Glazed Ceramics: A Comprehensive Guide
Painting already glazed ceramics offers a fantastic way to revitalize old pieces or add a personal touch to new ones. However, the smoothness of glazed surfaces requires specific techniques and materials to ensure lasting designs. This article provides a detailed guide, covering everything from surface preparation to paint application and protective sealing.
Preparing Your Glazed Ceramic Surface
Proper preparation is crucial for successful paint adhesion on glazed ceramics. The glossy surface can make it difficult for paint to stick, so thorough cleaning is essential. Begin by washing the ceramic item with soap and water to remove any dirt, dust, or oils (https://www.classpop.com/magazine/painting-ceramics). Follow this with an alcohol wipe to eliminate any remaining residues (https://www.triedandtrueblog.com/how-to-paint-glazed-ceramic/).
Next, lightly sand the glazed surface with fine-grit sandpaper (https://www.classpop.com/magazine/painting-ceramics). This step aims to create a slightly rougher texture without removing the glaze entirely, providing a better grip for the paint. After sanding, remove all sanding dust with a clean, damp cloth (https://www.classpop.com/magazine/painting-ceramics). Some artists also recommend applying a primer specifically designed for ceramics. Primers enhance paint adhesion and can significantly extend the life of your painted design (https://www.classpop.com/magazine/painting-ceramics). Taking the time to prepare the surface properly ensures a more durable and lasting painted design.
Choosing the Right Type of Paint
Selecting the appropriate paint is essential for achieving a durable finish on glazed ceramics. While various paints can be used, some are better suited due to their adhesive properties and durability. Acrylic paints are a popular choice due to their availability, wide range of colors, and ease of use (https://lakesidepottery.com/Pages/Pottery-tips/painting-coloring-repaired-ceramic-sculpture-tutorial.htm). For glazed ceramics, it’s advisable to use high-quality acrylic paints specifically formulated for glass or ceramics, such as DecoArt Glass Paint, as these offer better adhesion (https://www.triedandtrueblog.com/how-to-paint-glazed-ceramic/). These paints often have a thicker consistency, providing better coverage with fewer coats (https://www.triedandtrueblog.com/how-to-paint-glazed-ceramic/).
Enamel paints are another option, known for their glossy finish and durability. They are particularly suitable for items that will be handled frequently or exposed to the elements. However, enamel paints can have a strong odor and may require longer drying times. Specialized ceramic paints, available at art supply stores, are designed specifically for use on ceramics and offer excellent adhesion and vibrant colors. Another option is translucent or opaque glaze water-based colors, which are used to create decorative finishes (https://www.ceramic-glazes.com/effect-glazes). The best paint for your project will depend on your desired finish, the intended use of the ceramic piece, and your personal preferences.
Painting Techniques and Application
With your surface prepped and paint chosen, it’s time to begin painting. Apply thin, even coats of paint, avoiding excessive amounts to prevent drips and uneven coverage. Allow each coat to dry completely before applying the next (https://www.triedandtrueblog.com/how-to-paint-glazed-ceramic/). Depending on the paint used, multiple coats may be necessary to achieve full opacity. For intricate designs, use fine-tipped brushes for precise lines and details. Larger flat brushes are suitable for larger areas, while small, round-tip brushes are better for patterns or designs (https://diamondcoretools.com/blogs/resources/pottery-glazing-techniques?srsltid=AfmBOooaJwOVzcCuCYdVRJc2p2WcZ5rqnHI-V6iSarbp5OK8sH-yxOnq).
To avoid brush strokes, maintain a consistent brush direction and avoid going over the same area repeatedly while the paint is drying. For unique effects, explore stippling, sponging, or glaze trailing techniques to add texture and visual interest to your design (https://ceramicartsnetwork.org/pottery-making-illustrated/pottery-making-illustrated-article/8-Ways-to-Apply-Glaze). For example, use a slip trailer, a small squeezable bottle with an aperture tip, to create patterns (https://ceramicartsnetwork.org/pottery-making-illustrated/pottery-making-illustrated-article/8-Ways-to-Apply-Glaze). Patience is crucial; taking your time and allowing each layer to dry properly will result in a smoother, more professional-looking finish.
Sealing and Curing for Durability
After painting, sealing and curing are essential to protect your work and ensure its longevity. Sealing prevents chipping and fading and makes your ceramic piece suitable for practical use (https://drawlish.com/blogs/trending-articles/how-to-seal-acrylic-paint-on-ceramic?srsltid=AfmBOorYL3enT5zBYIt3vBY1oG8evmCGXEVrYLyEFbawcqiEyyEgG7mA). There are several options for sealants, each with its own pros and cons. Ceramic glaze can be applied for a glossy finish and added durability, but this usually requires firing the piece in a kiln. For a less involved method, use a water-based polyurethane varnish, clear acrylic coat, or Mod Podge (https://drawlish.com/blogs/trending-articles/how-to-seal-acrylic-paint-on-ceramic?srsltid=AfmBOorYL3enT5zBYIt3vBY1oG8evmCGXEVrYLyEFbawcqiEyyEgG7mA).
Apply the sealant in a well-ventilated area using even strokes to cover the entire painted surface (https://drawlish.com/blogs/trending-articles/how-to-seal-acrylic-paint-on-ceramic?srsltid=AfmBOorYL3enT5zBYIt3vBY1oG8evmCGXEVrYLyEFbawcqiEyyEgG7mA). Follow the manufacturer’s instructions for drying times, as some sealants may require several hours or even days to fully cure. Some sealants may require baking in an oven to cure, so be sure to read the instructions carefully (https://drawlish.com/blogs/trending-articles/how-to-seal-acrylic-paint-on-ceramic?srsltid=AfmBOorYL3enT5zBYIt3vBY1oG8evmCGXEVrYLyEFbawcqiEyyEgG7mA). While sealing protects your design, not all sealants are food-safe or dishwasher-safe (https://bigceramicstore.com/pages/info-ceramics-tips-tip18_waterproof_ceramics). If you intend to use your painted ceramic for dining, choose a sealant specifically labeled as food-safe and follow the manufacturer’s recommendations for use and care.
 Where to Buy Ceramics to Paint: A Comprehensive Guide
 Where Can I Buy Ceramics to Paint Near Me?: Your Creative Pottery Guide
 What Paint Is Used for Pottery? A Comprehensive Guide